How to use git?
Contents
Basic Terminology
git
A versioning system for (mostly text-based) files. It allows you to keep track of any change you made to a given file and runs on your local system (PC, laptop, etc…). Each change you want tracked (e.g. “commit”) is stored in a local directory (.git) automatically created inside the folder you want to track.
repository
By definition, a repository is a place where things may be put for safekeeping. A git repository is basically the same, with the added possibility to manage and track changes of stored items. So basically, anything you store in the PlantMicrobe Datahub instance is stored inside a repository (or brief “repo”) by deafault and tracked using git.
GitLab
An online platform which is similar to Github. It allows you to remotely store your local git repository and share it with others or publish it as a whole. Unlike Github, GitLab provides the possibility to host it on your own servers making it more customizable and secure.
Datahub
Usually describes solutions to manage and share your research data as well as making it publically accessible. In case of PlantMicrobe, which is based on the DataPLANT approach, it specifically refers to a GitLab instance used to track, upload and share your data (e.g. Research Data Management).
Remote data: Datahub
In this section you will find how to create a repository and manage your data in our remote Datahub instance
Create a new repository
ARCManager
The easiest way to create a repository for your data is the ARCManager. It will automatically create a basic ARC structure for your files and store it in a Datahub repository.
Please see our documentation on how to use the ARCManager: https://verda.plantmicrobe.de/knowledge-base/arc
Datahub
If you want to just quickly store some data, where an ARC structure is not needed, you can also create a repository directly using the Datahub web interface.
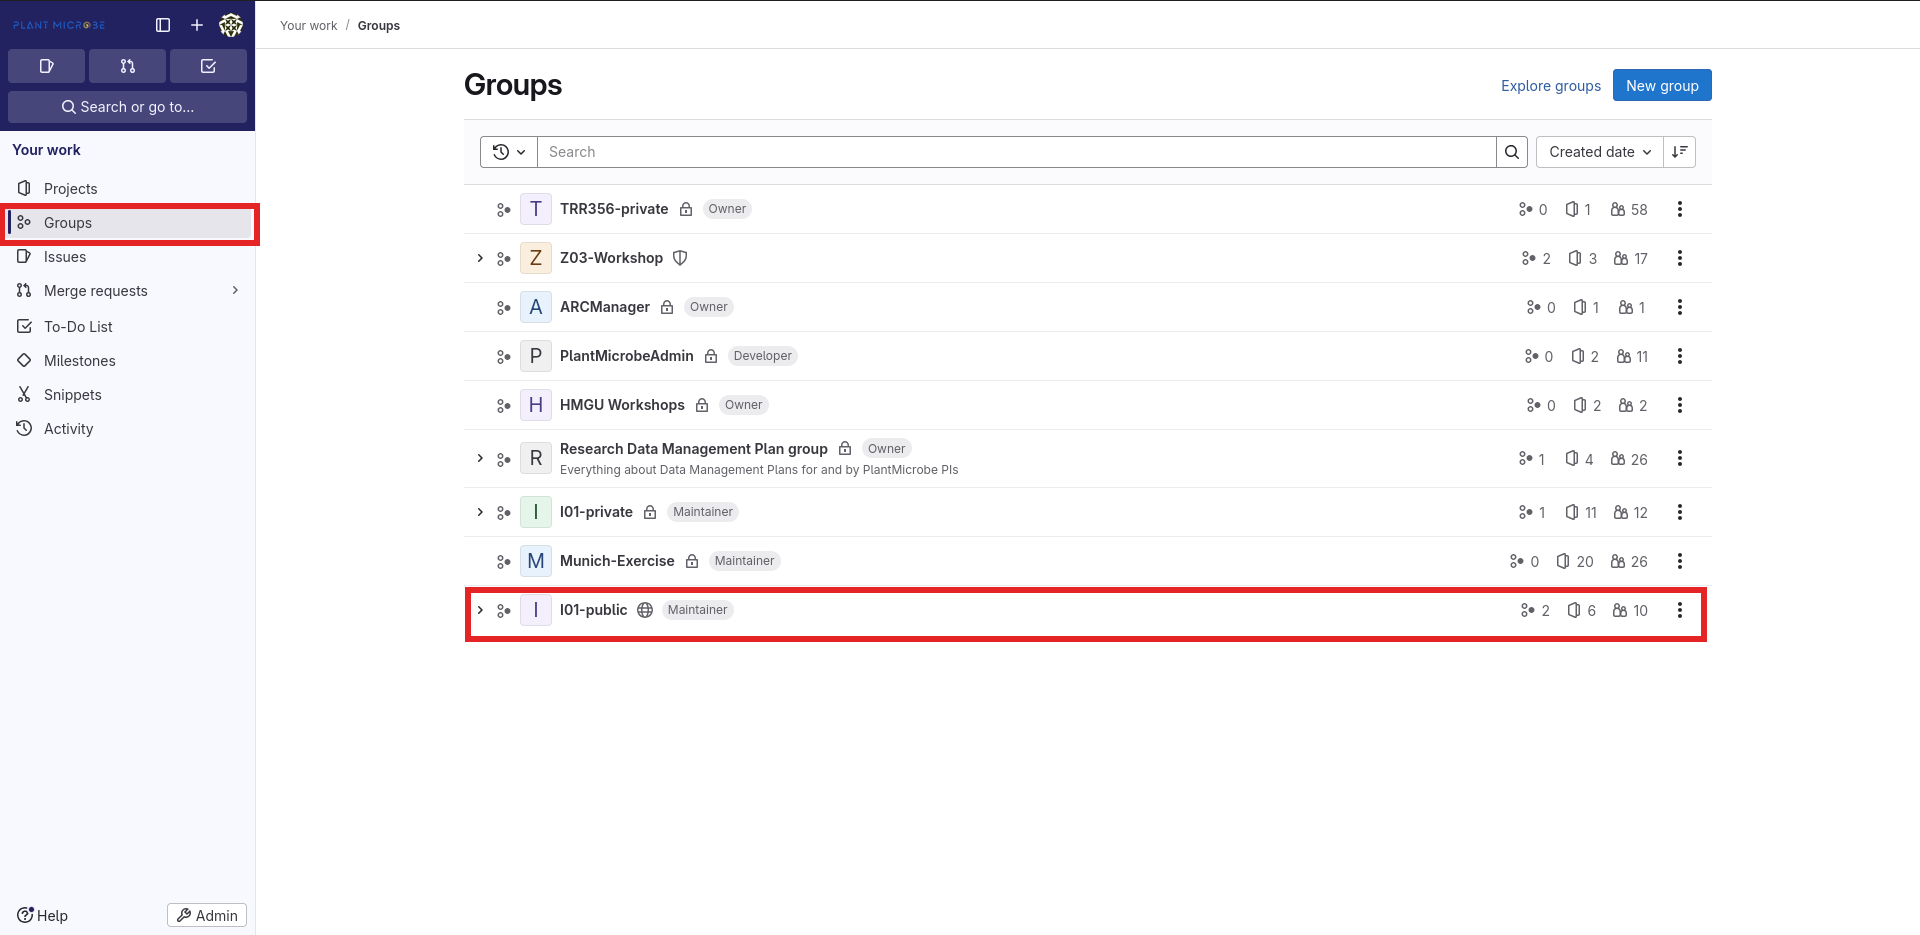
It is recommended to store any such projects in your TRR projects group (e.g. I01, B02, …), so navigate there first
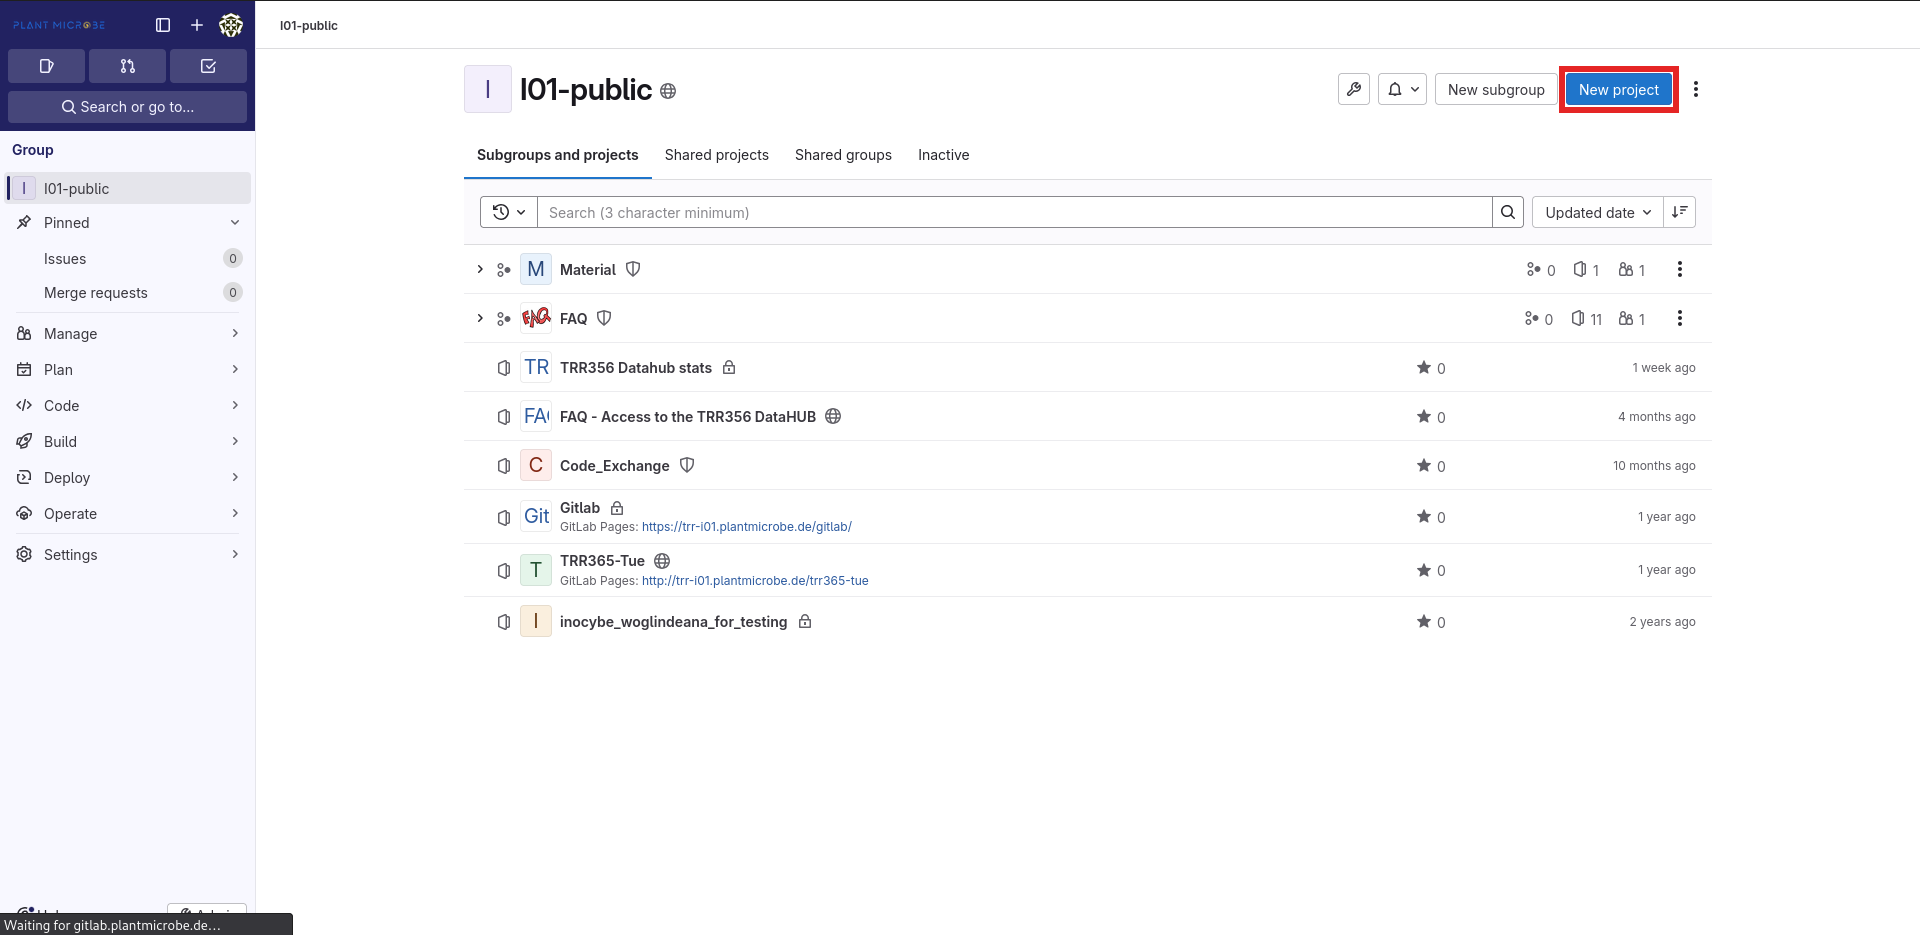
Now create a new project by pressing “New Project”
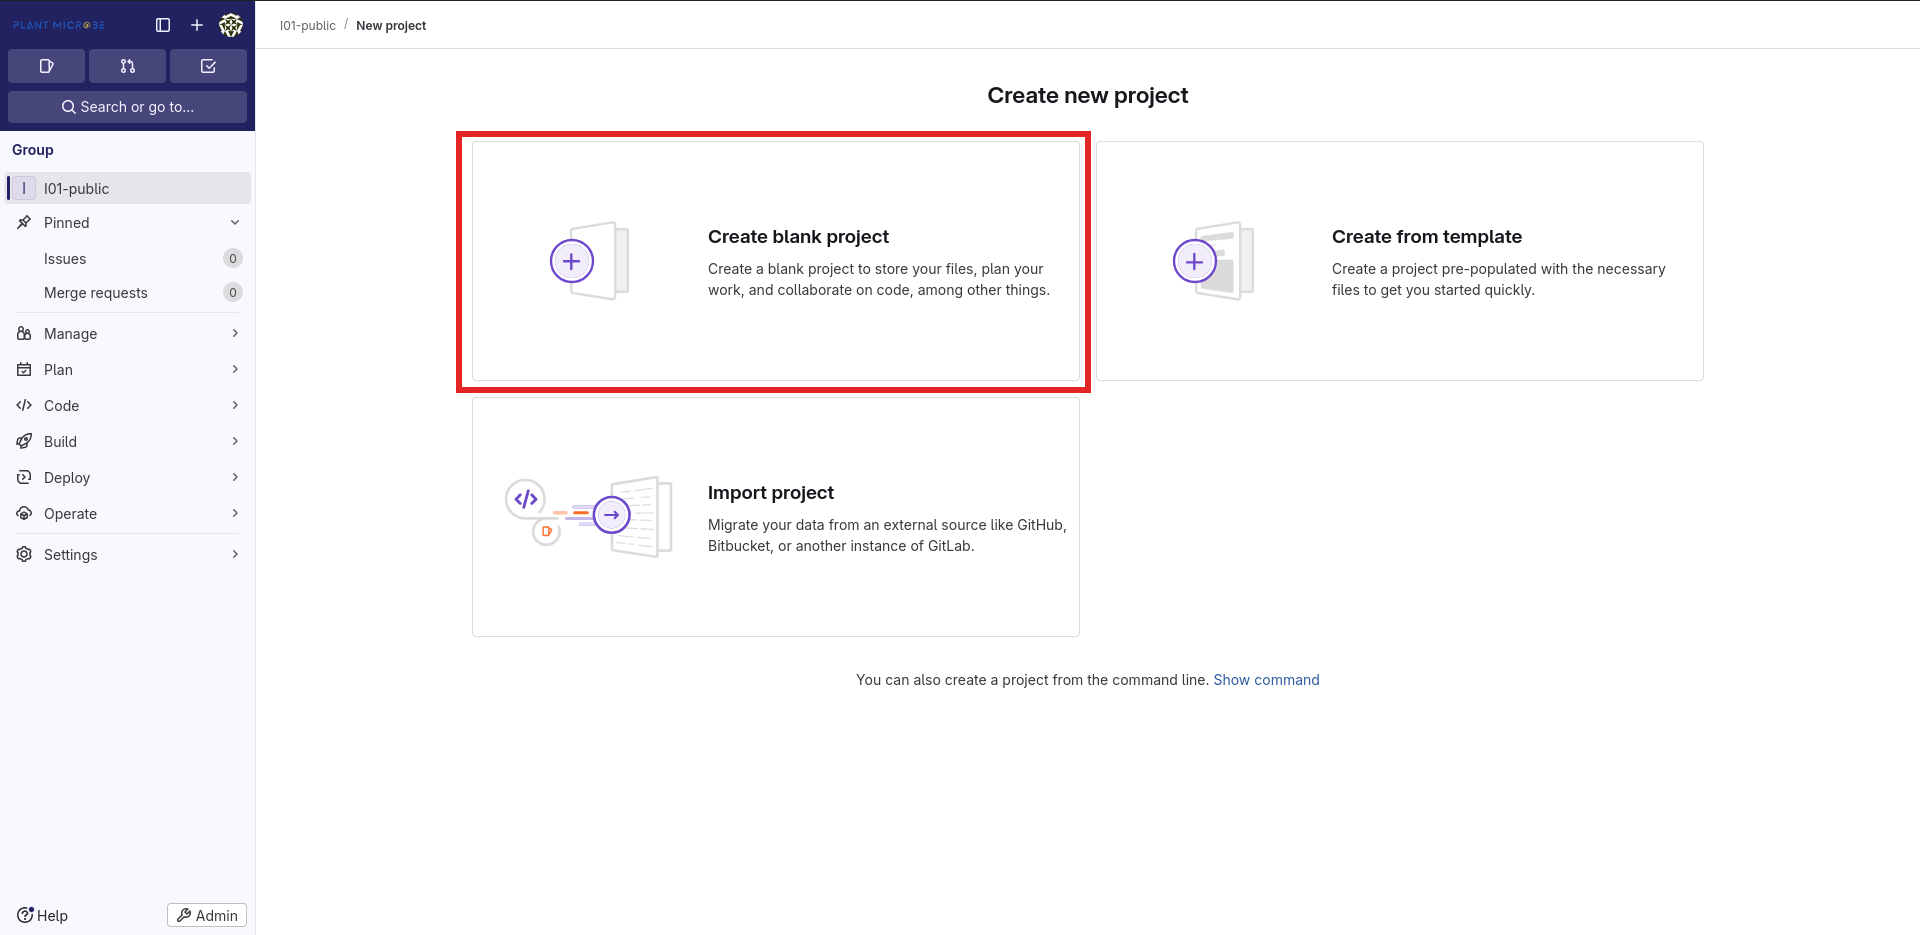
When asked what kind of project you want to create, choose “Create blank project”. The other options are possible too, if you have already created some templates or want to migrate your repository from another Datahub, Gitlab or other remote git instance (e.g. Github).
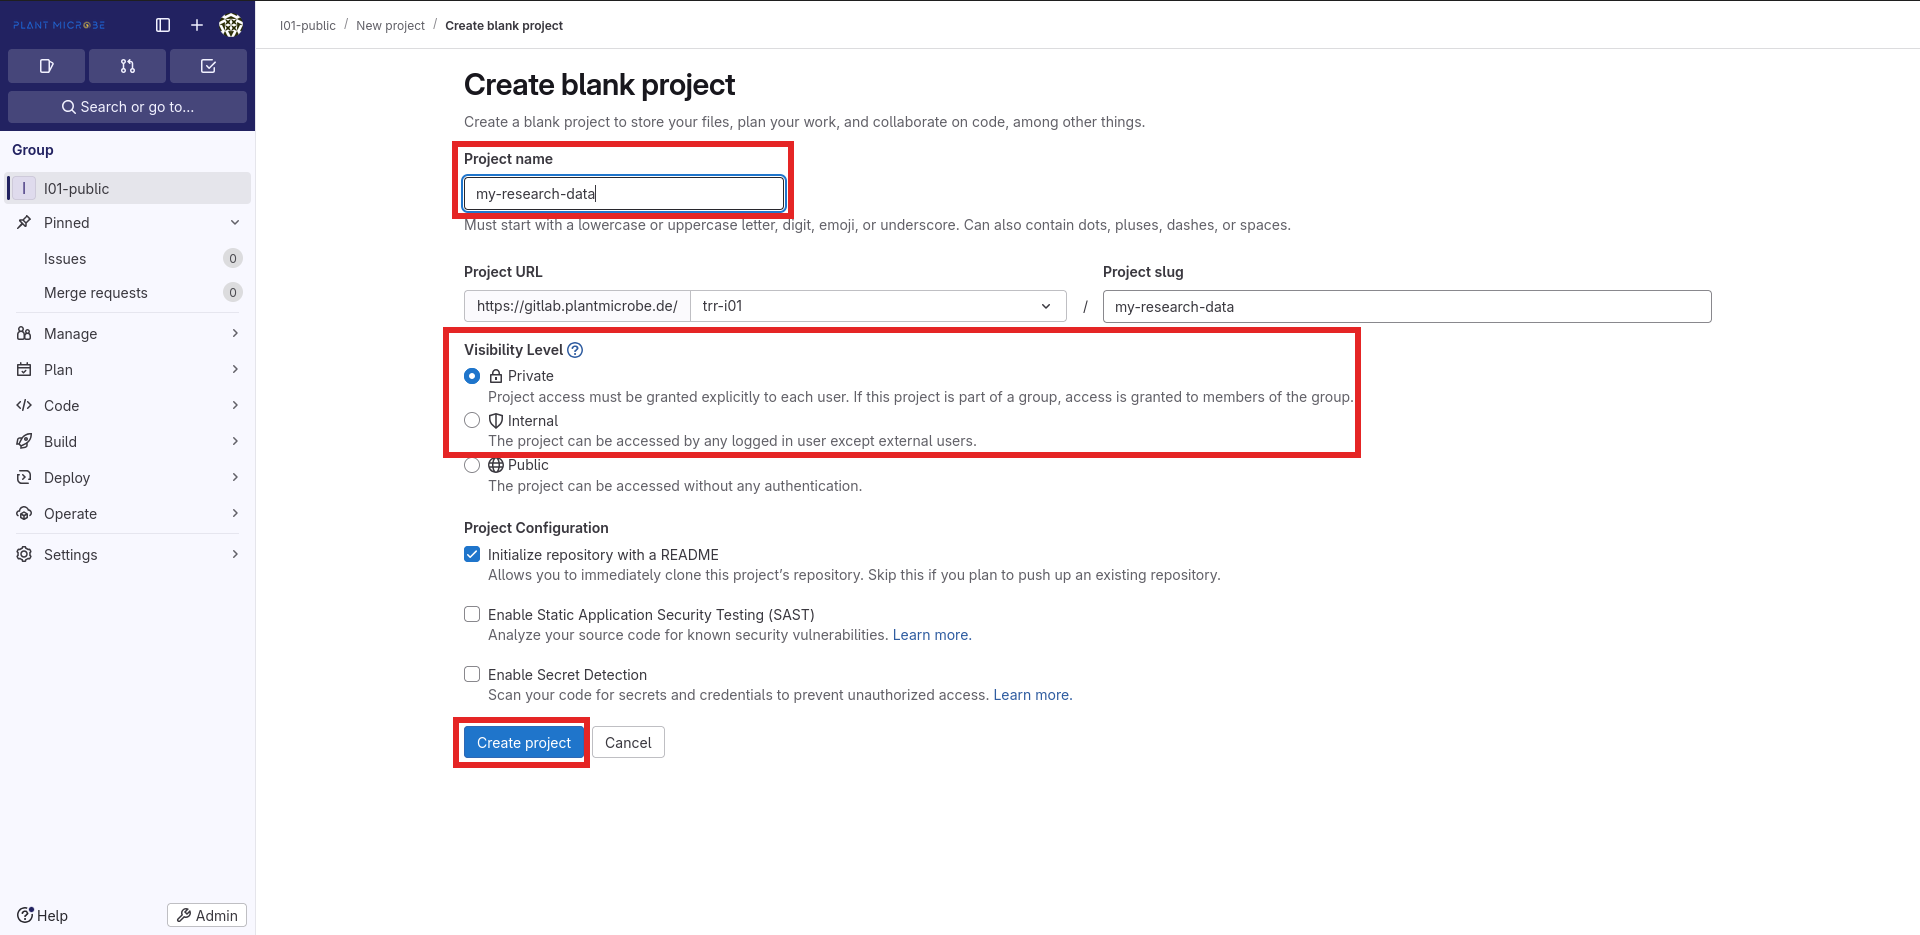
Now enter a descriptive name for your project (the URL slug will automatically match) and choose a “Visibility level”. It is recommended to make all projects Private at first, you can still make it available to non-group members later on. In cases where data must be published (e.g. a publication), make sure to still create it as Private or Internal first, so only TRR members are able to access and review your data prior to publication.
A project can only be “as public” as the group it is located in. So publishing a project inside a Private or Internal group is not possible. In that case, you would need to transfer your porject to a public group first
Done! Now you have created a new project!
As you can see, a README.md was created automatically, filled with some nonsense words about how to use git. You can simply delete those contents, and use this file to roughly explain your project to anyone who may stumble upon it in the future. It will be automatically rendered on the “starting page” of your repository in a nicely formatted way.
Now it is time to populate your project with some data.
Create and Edit files
Please be aware, that creating and editing files is only possible with plain text files.
Binary file types (e.g. ‘.xlsx’, ‘docx’, etc) are not tracked by git editing their content is therefore impossible.
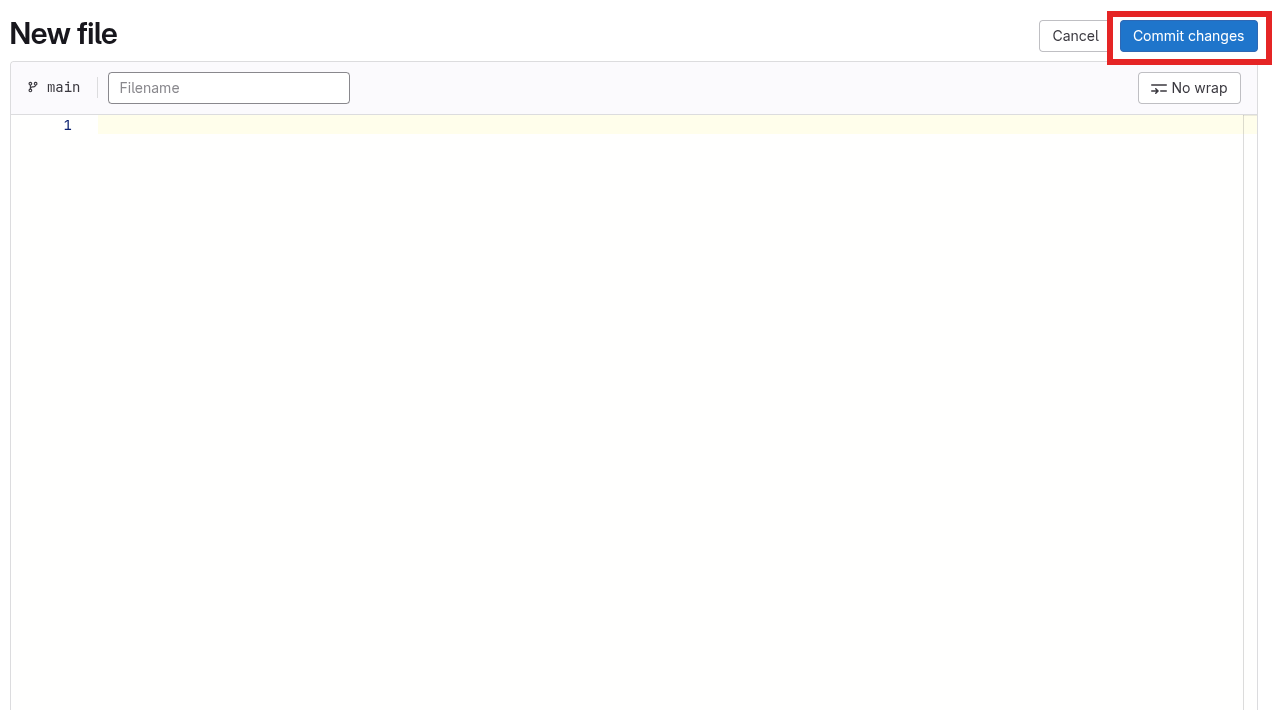
Create a new file
The ”+” dropdown menu allows you to create new text file from scratch using the web editor.
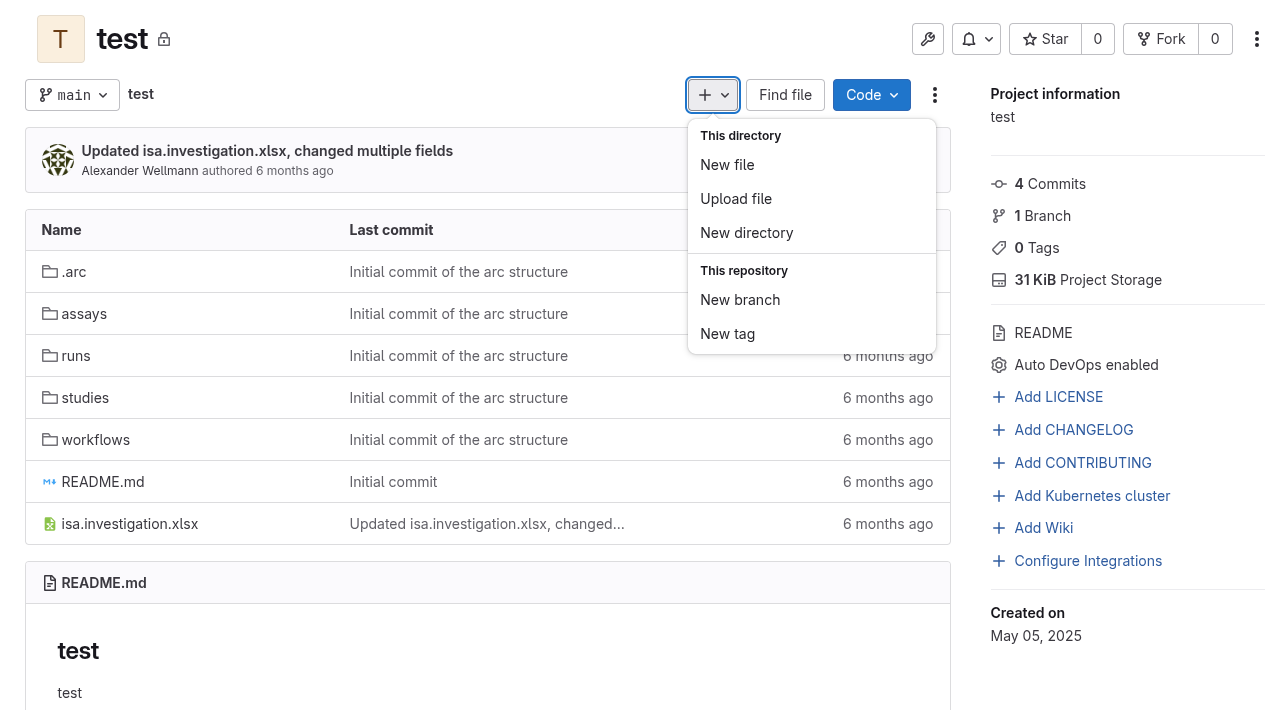
Make sure to press “Commit changes” in order to save your file
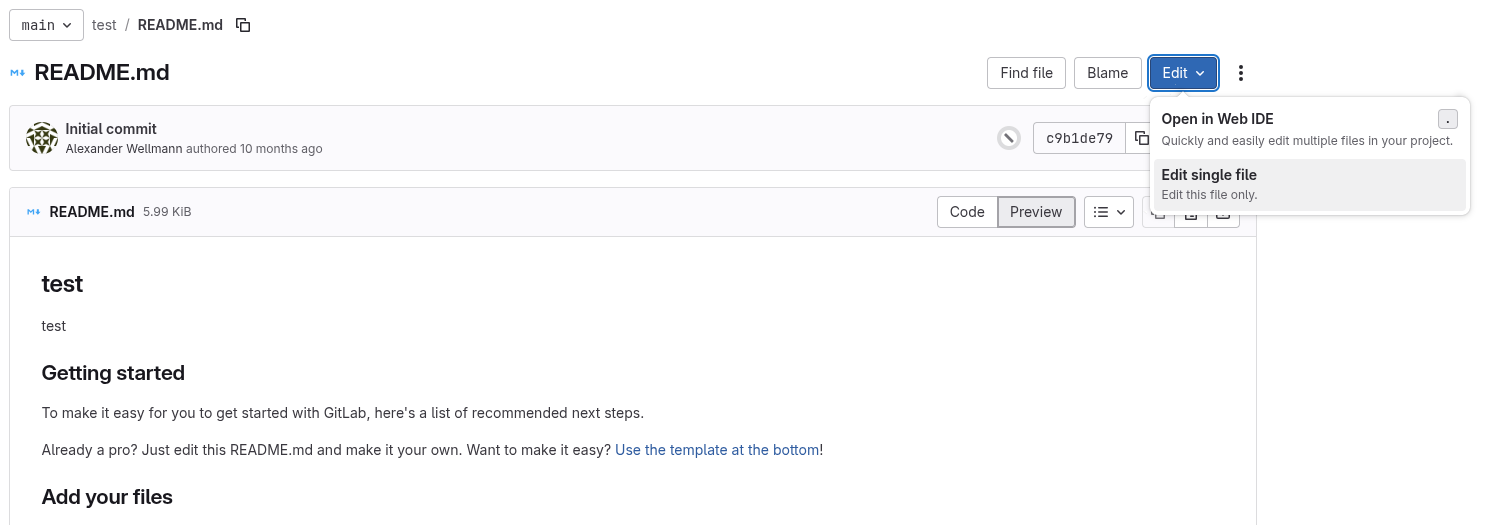
Edit text files
Editing files follows the same principle as creating a new one, you may even choose between a simple text editor and a full-fledged web-IDE
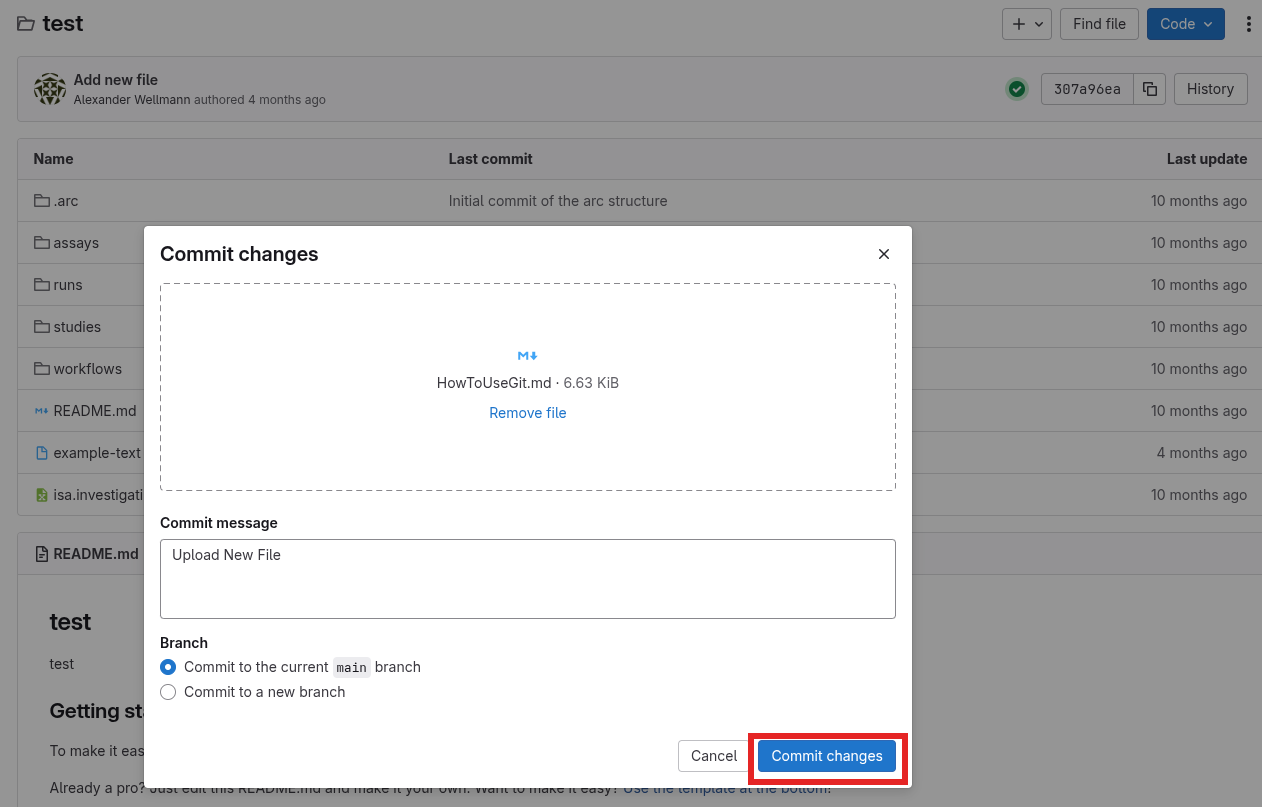
Upload single files
You can also upload single files to your project using the web interface. Open the ”+” dropdown and select “Upload file”. Make sure to “Commit” your upload, otherwise it is not complete
In case you want to uplad a large amount of files or directories it is recommended to use local file management and then push the repository as described in Local data: git
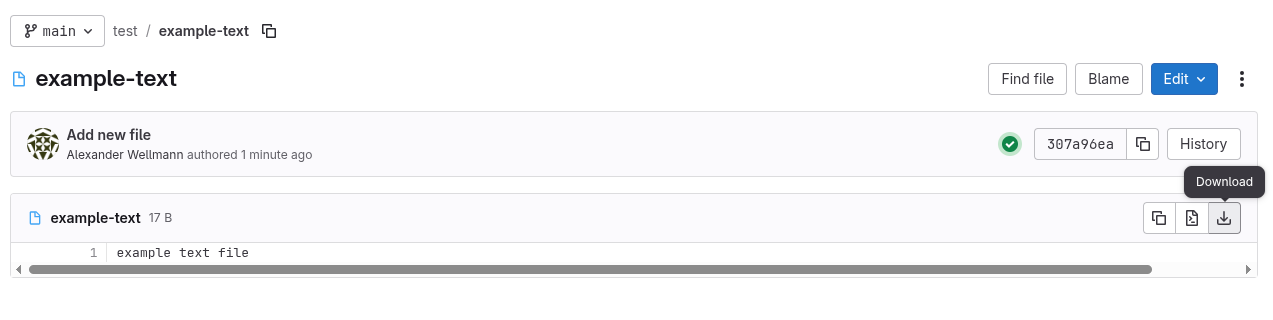
Download single files
Select a single file and click the “download” button
Download whole repository
You may also download a whole project (repository). Simply click on the “Code” button at the top and copy the URL under “Clone with HTTPS”.
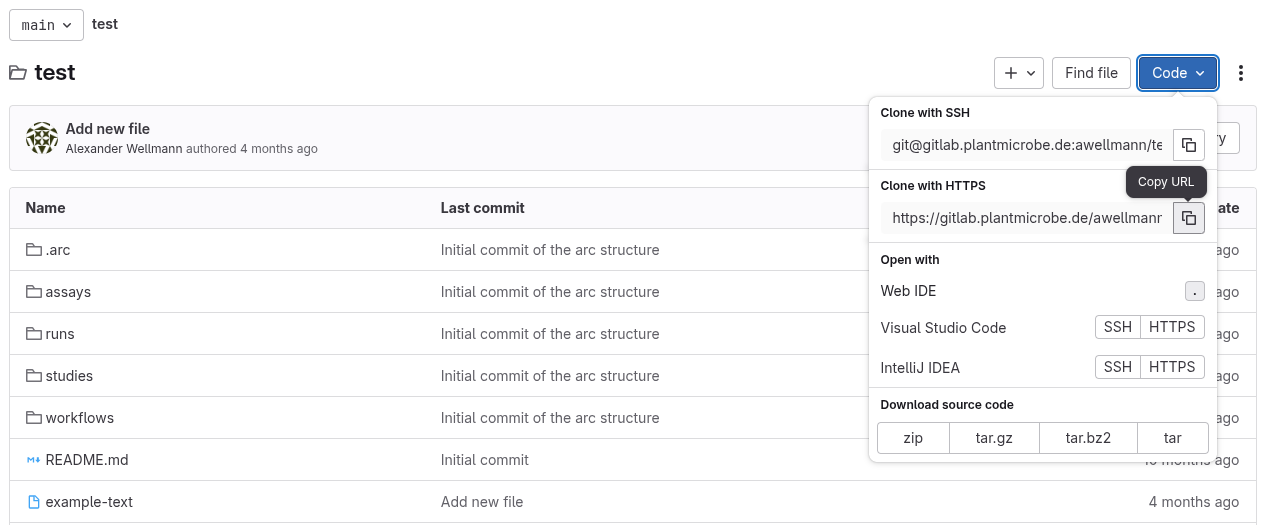
Now use either a GUI or the CLI on your local machine to download the repository, as described below!
Local data: git
Once you have downloaded a repository from the web (PlantMicrobe Datahub) to your local computer, there are many ways to interact with them. You can change them and upload your changes back to the remote Datahub using either a Graphical User Interface (GUI) or the command line (CLI).
Graphical user interface (GUI)
There are countless solutions which implement a Graphical User Interface for git, with git for windows being the most prominent example. Most IDEs, such as VSCodium also allow you to use git in a graphical way.
Choose whichever you prefer and follow the instructions there in order to install and use those GUIs, since this is beyond the scope of this article.
Command line interface (CLI)
Basic git workflow
Open any terminal application (e.g. “Terminal”, “Console”, “PowerShell”, etc.). Navigate to the directory you want your data/repository to be stored.
Copy the .git URL (see Download whole repository) and clone the repository to your machine.
git clone <GIT URL>Don’t forget to navigate inside your repo, to use the following
gitcommands properlycd my-local-repo
Now you can change your data locally, and once you are done commit those changes and sync them back to the remote repository.
git add . && git commit -m "A message describing your changes"
git push
In case your remote repository changes (collaborators pushed their own changes, someone made changes using the UI inside the Datahub), you can alsy sync those changes back to your local machine. Instead of cloning the whole repository simply pull the changes. Now your local repository is in-sync with the remote one
git pullYou can check the status of your local repository in-between those steps and actually anytime you want
git statusAdvanced usage
This section only covers a fraction of what is possible using the git CLI To learrn more, see the official git manual
In case you want to see remote changes but do not want to pull those changes to your local repository, you can fetch and evaluate them first
git fetch
git status
It is also possible to create a new branch in your local repo first and the push it to the remote repo
git switch -c <YOUR NEW BRANCH>
git push -u origin
Large File Storage (LFS)
git as a tool was designed to manage small, plain-text files (~ MB range), keeping the total size of a repository small by only tracking changes made instead of storing distinct “copies” of each file. With a rising demand to also store large, binary files alongside already tracked text files, a new module was developed, which expands the basic git functionality. The large files are hereby “outsorced” to the Large File Storage, so they don’t clutter up your regular git repo. But each LFS tracked file has a pointer inside the repo storage, which is tracked and versioned the same way any other “non-lfs” is.
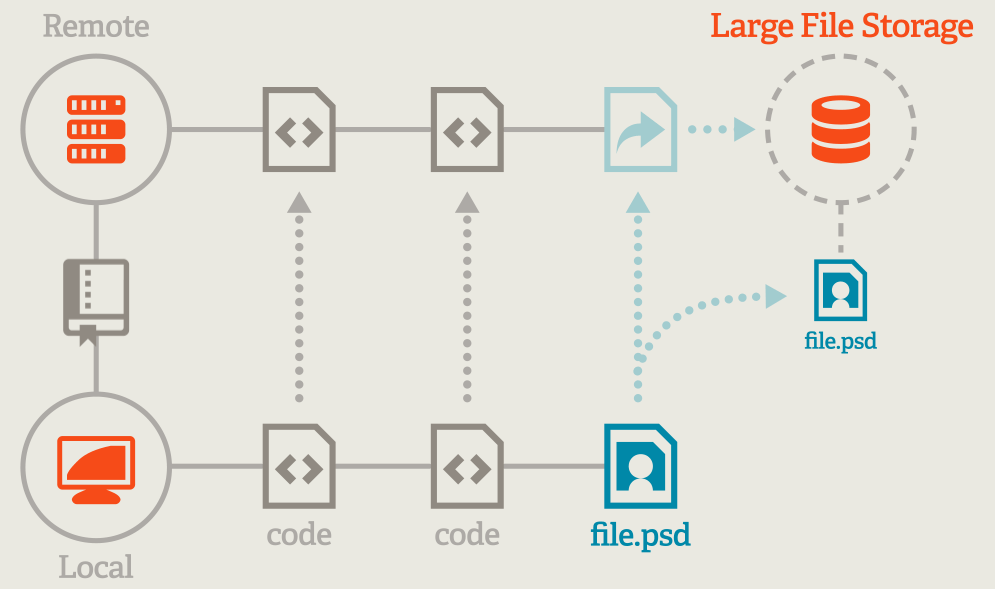
Git LFS concept. (2026). https://git-lfs.com/ (no license provided)
The PlantMicrobe Datahub heavily relies on this Large File Storage (LFS) module, to store and version your experimental, expanding on the limits set my git, and allowing file sizes up to 50GB! By default, any repository in the Datahub has the LFS module activated, but to also track large files locally you need to activel set it up. But don’t worry, it only takes a few easy steps!
1. Install the git lfs extension on your machine.
This depends on your operating system, so follow the official instructions or download the binary from the homepage and run it.
2. Activate git lfs inside your repo
From here on out, only CLI commands are given. Please see the git-lfs homepage if you want to proceed differently
Navigate inside your repo and run the following command
git lfs install3. Define the file-types you want to track
git will make no difference between “lfs files” and “non lfs files”, so by default no file is stored in the LFS. Therefore you need to manually define, which specific files or general extensions you want to be tracked and stored via LFS instead of git itself.
Simply run this command, which generate a .gitattributes inside your repo as well. Do not delete this file since it is responsible for the actual tracking.
# Track all files with a certain extension/filetype
git lfs track "*.<YOUR EXTENSION>"

# Track a specific file
git lfs track "myfile.ext"
Finally you need to make sure .gitattributes is actually tracked by git, so add it to your branch
git add .gitattributes3. Use git the same as before
You’re now good to go! Simply use the workflows described in the chapters before and git/git-lfs will take care of the rest!